Picture this, you turn on your computer and there's a message from
Police Central e-crime Unit accusing you of an internet crime (illegally distributing copyrighted files and pornography) and then it demands money. If you were faced with this fake message then your computer is infected with a virus called ransomware. And you're certainly not alone. These scams are spreading like wild fire and can definitely cause you trouble whether you give your money to the scammers or not.
Similar scams have also been out there claiming to be from
FBI and U.S. Justice Department. Whether it would be the Police Central e-crime Unit virus or any other similar scam they all have one thing in common, they lock down your computer and then demand money. If you pay the scammers to unlock your computer, they may actually dot but will most likely continue to use your computer secretly to launch even more virus attacks and internet scams.
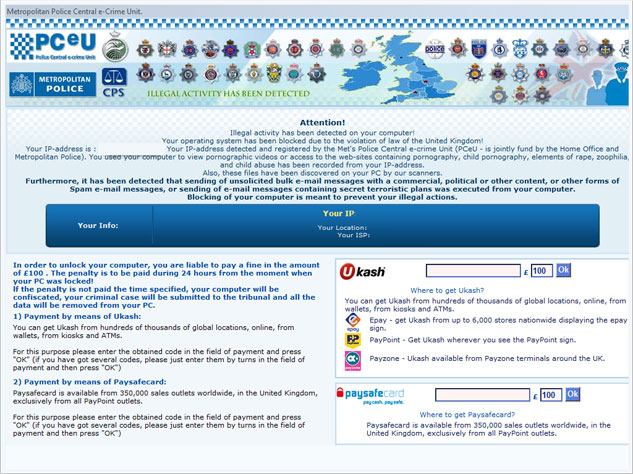
So far, we've seen two slightly different variants of Police Central e-crime Unit ransomware. The first variant belongs to the Win32/Weelsof malware family. Basically, it's a Trojan that allows hackers to perform a number of actions on the infected computer. And they certain can launch such fake Police warnings as shown in the image below.
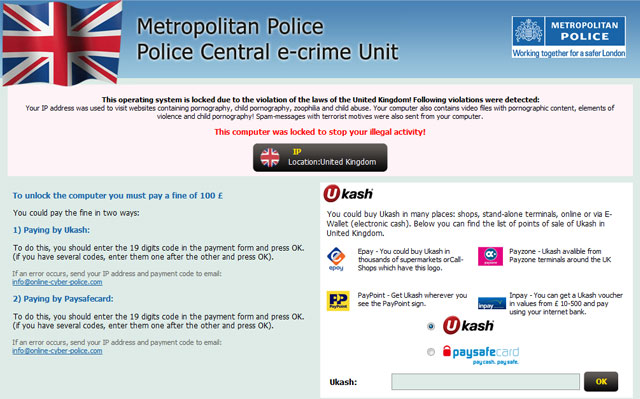
While this one is clearly targeting UK users, scammers have very similar scams ready to be used in other countries as well.
The Weelsof Trojan is a new piece of malware. It was documented earlier this year (June, 2012). Please note that ransomware scam is only one of its payloads. Fortunately, most antivirus programs will detect this ransomware right away but if your computer caches this virus then you need to get a better protection.
The second variant of Police Central e-crime Unit (PCeU) ransomware belongs to the Win32/Reveton malware family. As you can see, the fake waning is slightly different, more sophisticated, claiming to be from Specialist Crime Directorate rather than Metropolitan Police.
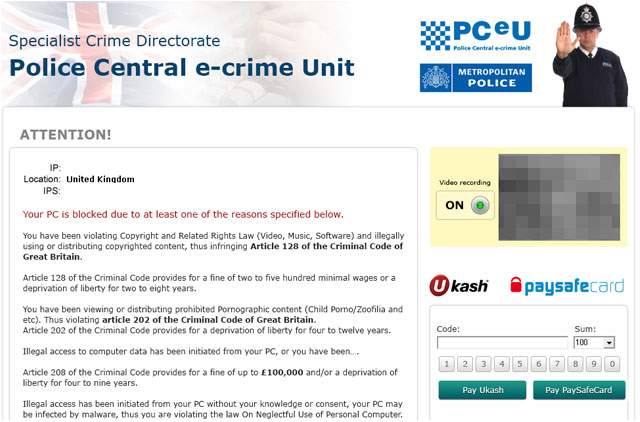
They even added a web cam image to give the impression that the victim is under surveillance. Of course, they do not actually activate your web cam even if you have it. Scammers display the same picture on every infected machine. So, don’t worry about that.
Very often, people download and install such scams voluntarily. Malware applications are usually disguised as a software upgrade. People don't know what that is and they think they need it because it looks like they do. Besides, something as simple as opening PDF file can infect computer or allow scammers to download Police Central e-crime Unit virus on your computer. Keep in mind that other software applications are vulnerable too.

Scammers exploit Java and Flash vulnerabilities to load the malicious code on targeted computers. It's very important to keep your machine updated. What is more, cyber criminals use valid software certificates and other possible methods to avoid detection and to infect as many computers as possible.
So, if you got infected with this fake Police Ukash virus, please follow the steps in the removal guide below. Sometimes, users can restart infected computers in Safe Mode. That makes the removal procedure a lot easier. Unfortunately, most of the time this ransomware comes bundled with other malware that locks down the computer completely. In such case, Live CD is the only option. We will show you how to remove Police Central e-crime Unit virus using Kaspersky Rescue Disk. Hopefully, this virus will only cost you time without taking your money too.
If you have any questions about this infection or need help removing it, please leave a comment below. Good luck!
Source: http://deletemalware.blogspot.com
Method 1: Police Central e-crime Unit virus removal instructions using System Restore in Safe Mode with Command Prompt:1.
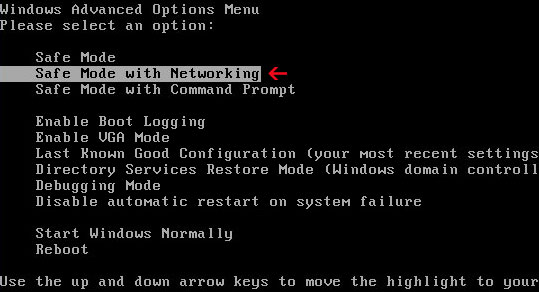
Unplug your network cable and manually turn your computer off. Reboot your computer is "Safe Mode with Command Prompt". As the computer is booting tap the "F8 key" continuously which should bring up the "Windows Advanced Options Menu" as shown below. Use your arrow keys to move to "Safe Mode with Command Prompt" and press Enter key.
2. Make sure you log in to an account with administrative privileges (login as admin).
3. Once the Command Prompt appears you have few seconds to type in
explorer and hit Enter. If you fail to do it within 2-3 seconds, the Police Central e-crime Unit ransomware will take over and will not let you type anymore.
4. If you managed to bring up Windows Explorer you can now browse into:
- Win XP: C:\windows\system32\restore\rstrui.exe and press Enter
- Win Vista/Seven: C:\windows\system32\rstrui.exe and press Enter
5. Follow the steps to restore your computer into an earlier day.
6. Download recommended
anti-malware software (direct download) and run a full system scan to remove the remnants of Police Central e-crime Unit virus.
Method 2: Police Central e-crime Unit virus removal instructions using System Restore in Safe Mode:1. Power off and restart your computer. As the computer is booting tap the "
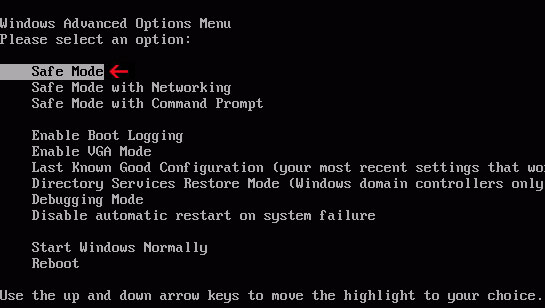
F8 key" continuously which should bring up the "Windows Advanced Options Menu" as shown below. Use your arrow keys to move to "
Safe Mode" and press Enter key.
NOTE:
Login as the same user you were previously logged in with in the normal Windows mode.
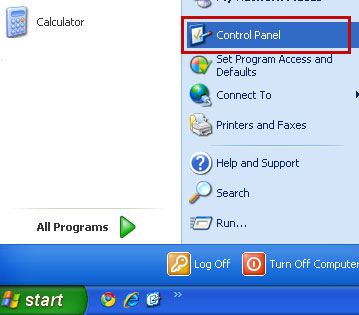
2. Once in there, go to
Start menu and search for "
system restore". Or you can browse into the Windows Restore folder and run System Restore utility from there:
- Win XP: C:\windows\system32\restore\rstrui.exe double-click or press Enter
- Win Vista/7/8: C:\windows\system32\rstrui.exe double-click or press Enter
3. Select
Restore to an earlier time or
Restore system files... and continue until you get into the System Restore utility.
4. Select a restore point from well before the Police Central e-crime Unit virus appeared, two weeks should be enough.
5. Restore it. Please note, it can take a long time, so be patient.
6. Once restored, restart your computer and hopefully this time you will be able to login (Start Windows normally).
7. At this point, download recommended
anti-malware software (direct download) and run a full system scan to remove the Police Central e-crime Unit virus.
Method 3: Police Central e-crime Unit virus removal instructions using MSConfig in Safe Mode:1. Power off and restart your computer. As the computer is booting tap the "
F8 key" continuously which should bring up the "Windows Advanced Options Menu" as shown below. Use your arrow keys to move to "
Safe Mode" and press Enter key.
NOTE:
Login as the same user you were previously logged in with in the normal Windows mode.
2. Once in there, go to
Start menu and search for "
msconfig". Launch the application. If you're using Windows XP, go to
Start then select
Run.... Type in "
msconfig" and click OK.
3. Select
Startup tab. Expand
Command column and look for a startup entry that launches randomly named file from %AppData% or %Temp% folders using rundll32.exe. See example below:
C:\Windows\System32\rundll32.exe C:\Users\username\appdata\local\temp\regepqzf.dll,H1N14. Disable the malicious entry and click OK to save changes.
5. Restart your computer. This time Start Windows normally. Hopefully, you won't be prompted with a fake Police Central e-crime Unit virus screen.
6. Finally, download recommended
anti-malware software (direct download) and run a full system scan to remove the Police Central e-crime Unit virus.
Method 4: Police Central e-crime Unit Ransomware removal using Kaspersky Rescue Disk:1. Download the
Kaspersky Rescue Disk iso image from the Kaspersky Lab server. (
Direct download link)
Please note that this is a large downloaded, so please be patient while it downloads.
2. Record the Kaspersky Rescue Disk iso image to a CD/DVD. You can use any CD/DVD record software you like. If you don't have any, please download and install
ImgBurn. Small download, great software. You won't regret it, we promise.
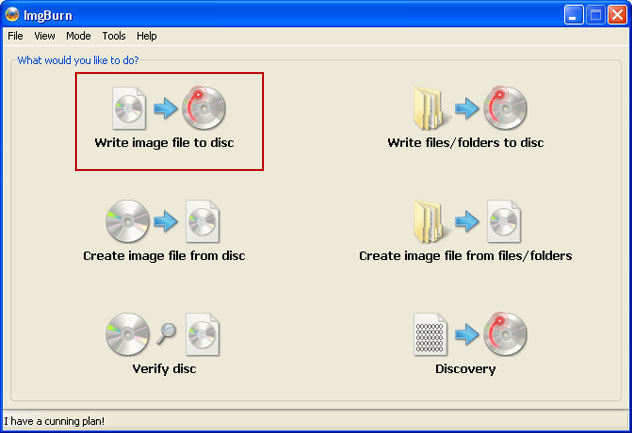
For demonstration purposes we will use ImgBurn.
So, open up ImgBurn and choose
Write image file to disc.
Click on the small
Browse for file icon as show in the image. Browse into your download folder and select
kav_rescue_10.iso as your source file.
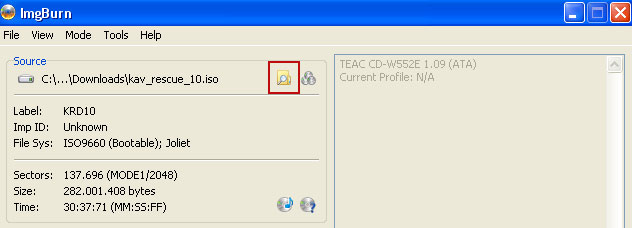
OK, so know we are ready to burn the .iso file. Simply click the
Write image file to disc button below and after a few minutes you will have a bootable Kaspersky Rescue Disk 10.

3. Configure your computer to boot from CD/DVD. Use the
Delete or
F2,
F11 keys, to load the
BIOS menu. Normally, the information how to enter the BIOS menu is displayed on the screen at the start of the OS boot.

The keys F1, F8, F10, F12 might be used for some motherboards, as well as the following key combinations:
- Ctrl+Esc
- Ctrl+Ins
- Ctrl+Alt
- Ctrl+Alt+Esc
- Ctrl+Alt+Enter
- Ctrl+Alt+Del
- Ctrl+Alt+Ins
- Ctrl+Alt+S
If you can enter
Boot Menu directly then simply select your CD/DVD-ROM as your
1st boot device.
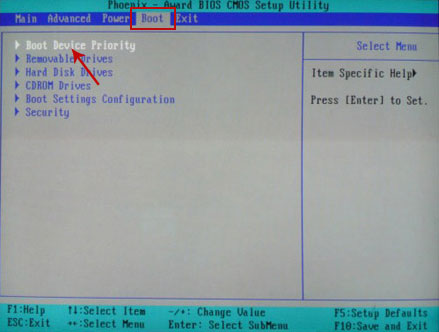
If you can't enter Boot Menu directly then simply use
Delete key to enter
BIOS menu. Select
Boot from the main BIOS menu and then select
Boot Device Priority.
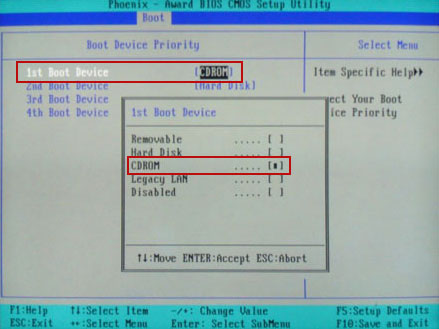
Set CD/DVD-ROM as your
1st Boot Device. Save changes and exist BIOS menu.
4. Let's boot your computer from Kaspersky Rescue Disk.
Restart your computer. After restart, a message will appear on the screen:
Press any key to enter the menu. So, press
Enter or any other key to load the Kaspersky Rescue Disk.

5. Select your language and press
Enter to continue.

6. Press
1 to accept the End User License Agreement.

7. Select
Kaspersky Rescue Disk. Graphic Mode as your startup method. Press
Enter. Once the actions described above have been performed, the operating system starts.

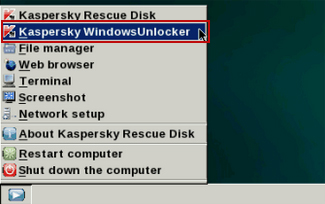
8. Click on the
Start button located in the left bottom corner of the screen. Run
Kaspersky WindowsUnlocker to remove Windows system and registry changes made by Police Central e-crime Unit virus. It won't take very long.
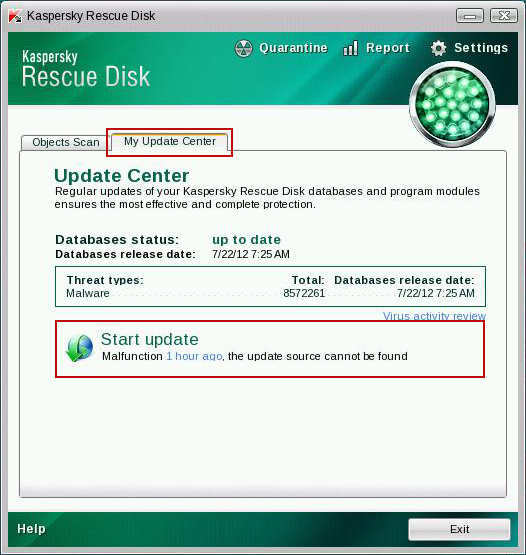
9. Click on the
Start button once again and fire up the
Kaspersky Rescue Disk utility. First, select
My Update Center tab and press
Start update to get the latest malware definitions. Don't worry if you can't download the updates. Just proceed to the next step.
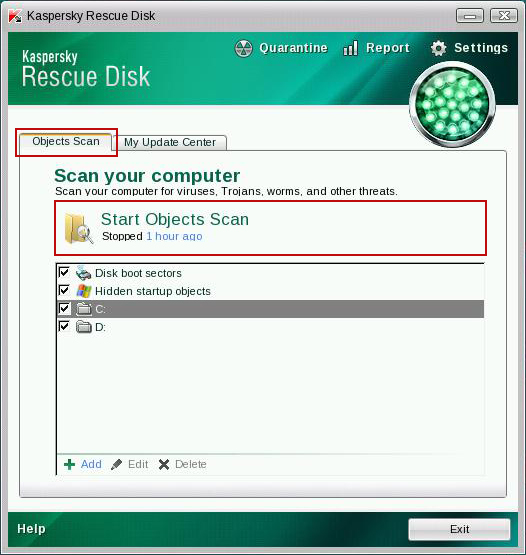
10. Select
Object Scan tab. Place a check mark next to your local drive C:\. If you have two or more local drives make sure to check those as well. Then click
Start Objects Scan to scan your computer for malicious software.
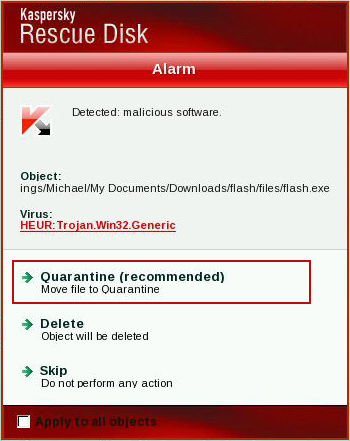
11.
Quarantine (recommended) or
delete every piece of malicious code detected during the system scan.
12. You can now close the Kaspersky Rescue Disk utility. Click on the
Start button and select
Restart computer.

13. Please restart your computer into the
normal Windows mode. Download recommended
anti-malware software (direct download) and run a full system scan to remove the remnants of Police Central e-crime Unit virus and to protect your computer against these types of threats in the future.
For for information about ransomware threats and possible removal methods, please read the general
ransomware removal guide.
Tell your friends: